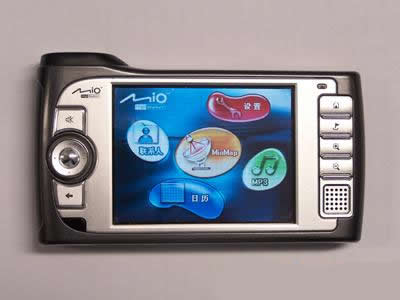
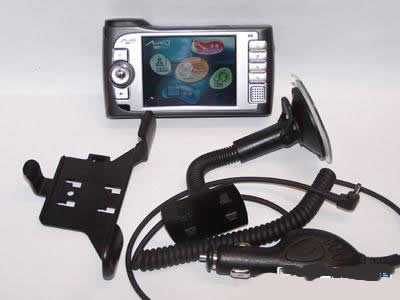
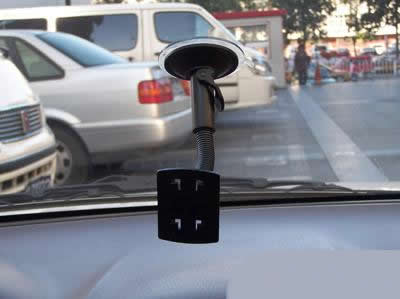
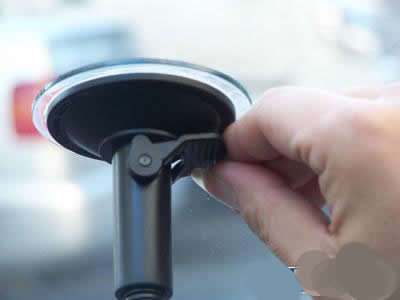
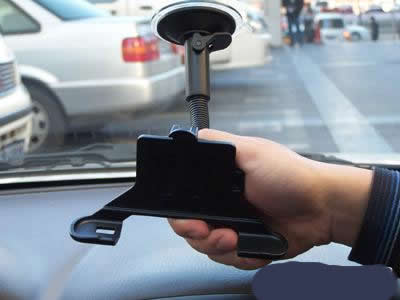
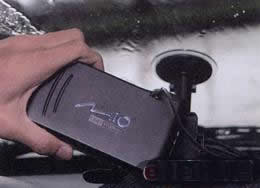
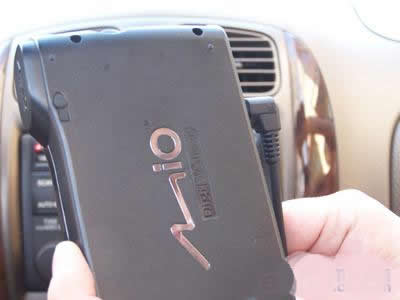
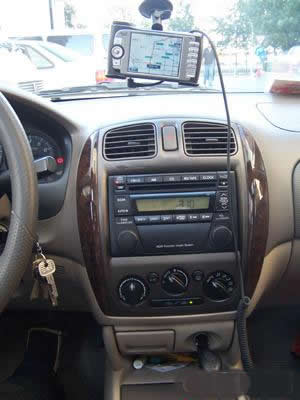
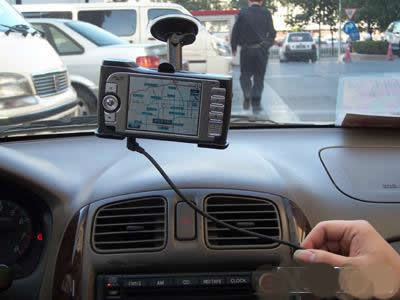
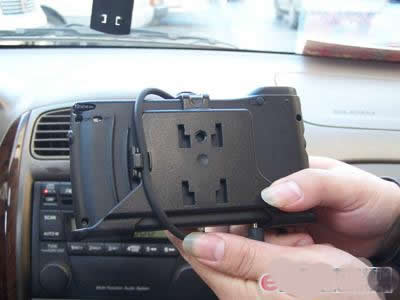
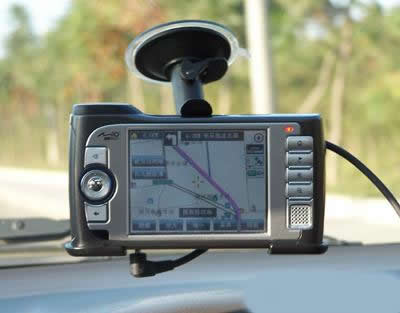
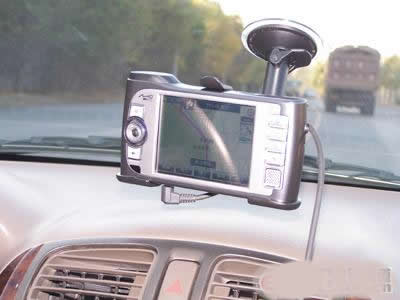
The advancement of technology stems from the needs and aspirations of human beings. The world-renowned portable automatic navigation system (PND) solution provider, Mio Technology, released a PND Mio 269 this year. Providing a complete solution for some of the troubles encountered in our travel, both the convenience of PDA handheld equipment and the installation on the car, the price is only half of the car-specific machine, and there is no need to worry about connecting the line and installing the software. Troubled, easy to operate, easy to use, just from these aspects will make people shine. The author took a field operation on the Mio 269 and easily upgraded the car equipment. This article refers to the address: http:// Equipment inventory First of all, we have to count the equipment that we bring on the car. Only when you are well prepared before the trip, you won't be in a hurry. This is the host of the Mio 269, you must remember to bring it! Mio 269 host How to install it in the car? Don't worry, there is a set of special car mounts in the original accessories that can hold the Mio 269 firmly and you can install the Mio 269 in the best visible position. The frame is divided into two parts: a powerful suction cup strut that draws in the front windshield, and a bracket that is tailored to the Mio 269. Host and components Of course, electronic products are inseparable from power. Although the Mio 269 has a built-in lithium battery, it can guarantee the endurance of the machine for more than four hours. However, for long-distance travel, the manufacturer attaches a car charger with care to meet the needs of the time. External antenna Mio269 has built-in the world's most advanced Star III GPS chip and antenna, and it is fast and accurate to accept GPS satellite signals. Therefore, when you locate successfully, you will not lose GPS satellite signals even if you are in the car. Of course, if some front windshield is covered with a high-temperature insulation paper, this may cause the satellite signal reception to be affected. At this time, if you have an external antenna on hand, it will help the Mio269 to receive GPS satellite signals better. The powerful magnet at the bottom can be firmly attached to the roof. Once the equipment is ready, you can start assembling! Install car charger, bracket and Mio 269 mainframe First, take out the suction cup support of the frame, find a proper position, and wipe it clean. The author suggests to choose the right front of the driver, that is, the center of the windshield, so that the driver does not have to turn his head to look at the screen, but also take into account the road surface. In addition, it is recommended to compare the approximate installation location with the host before installation, but do not install all components on the pillars and install them to prevent them from falling in the bumps when the installation is unstable. If you're thinking about bumps, you can also move the struts down a bit and install the main unit on the dashboard. After selecting the position, first push the wrench on the suction cup to the relaxed position, then slightly suck the suction cup on the front windshield, then push the wrench on the suction cup to the suction position, which will put the suction cup between the glass and the glass. Pull out a vacuum space to make the suction cup more secure. In this way, the suction cup support is easy to install. Next, take out the special tray and follow the label between the suction cup holder and the tray to clamp the tray. Apply a little force down to allow the bracket to snap into place. Before putting on the Mio 269, if an external antenna is required, this is the best time to install. Because the external antenna connector of the Mio 269 is on the back of the main unit, the MMCX connector is relatively small. Therefore, it is convenient to install the external antenna first. Following the shape of the Mio 269, place the lower part of the main unit on the tray frame, then push the frame in the up direction to push the main unit into the card, so that the entire body is firmly stuck on the frame. When you remove the main unit, you can easily take down the main unit by simply pulling the label on the hand. The external power outlet of the Mio 269 is in the middle of the lower left side of the main unit. Plug the plug into the Mio 269 first, then plug the car's power plug into the cigarette lighter on the car. It should be noted here that it is better to insert the plug into the cigarette lighter socket on the car after the car is started, to avoid the moment when the car is started, and the equipment is damaged due to unstable voltage. The external power cord is connected externally and does not seem to be secure. It doesn't matter, there is a power strip on the back of the tray, you can get stuck in the power cord, don't worry that the power cord will fall off during driving. Boot, positioning The Mio 269 uses the star III GPS global positioning module, so the positioning speed is very fast, and it will automatically locate immediately after the start-up, without the need for other connection and opening services. On the map page, immediately show the location of our vehicle, to see if this picture is amazing? 3D screen precise navigation starts with Mio 269! Through the quick navigation and handwriting input in the upper right corner of the host, we can quickly find the location to be reached, and the rest will be handed over to Mio 269, which will lead us to the designated destination quickly and safely. On the whole, the installation of the Mio 269 is very simple, and you don't need to install complicated software, you don't need to open the service. You can enjoy the convenience of satellite positioning when you turn it on. It is a good friend for those who want to buy an automatic navigation system. select!
Professional LED screen solutions, suitable for indoor and outdoor advertising display, concerts, parties, event, wedding, conference halls, meeting room etc.
As a professional manufacturer with 15 years experience, we are committed to producing high-quality products and providing professional and applicable LED display installation solutions. In addition, our company has long-term cooperation with well-known brand accessories suppliers, such as: King Light, Nova Star, G-energy, etc., We guarantee that the accessories used are genuine.
Led Screen,Led Display,Led Video Wall,Led Display Board Guangzhou Cheng Wen Photoelectric Technology Co., Ltd. , https://www.cwdisplay.com