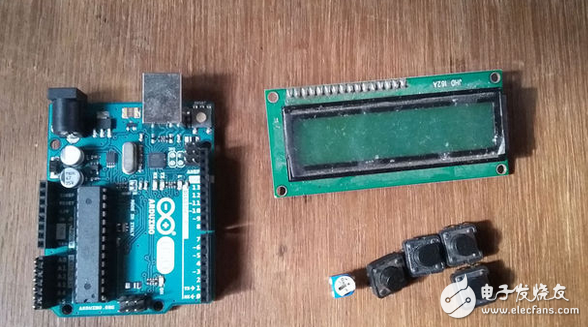
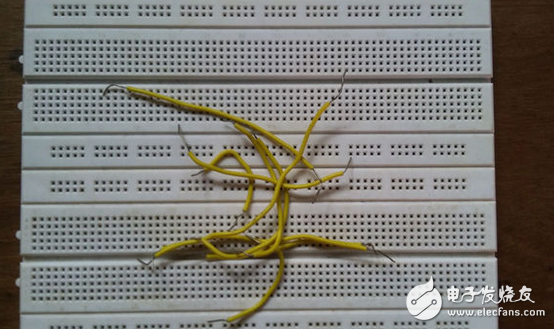
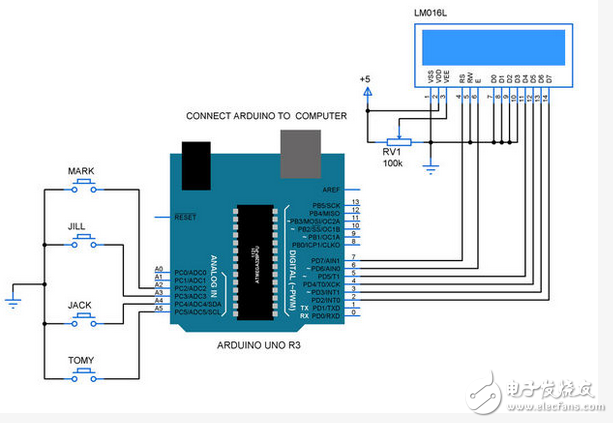
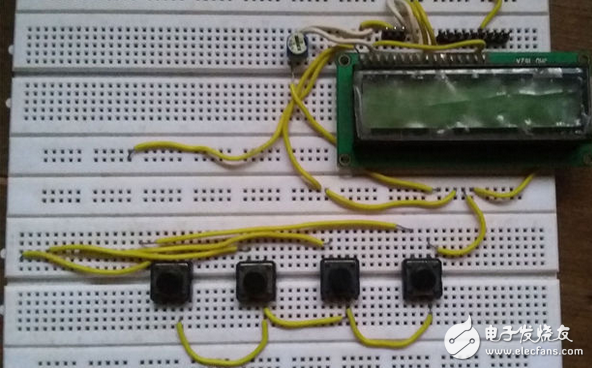
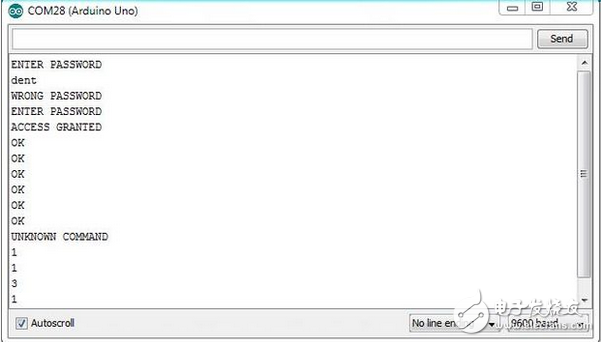
This project is to teach you how to build an Arduino-based voting machine using simple components such as buttons and LCD. The highlight of this system is that the Arduino IDE in the serial monitor is used to perform polling operations without the need for other external applications. Main features: · Each step of the polling operation is based on the supervisor's control. · The password activates the security system. · The results of the voting can be obtained immediately. · Voters know the candidates he votes for. The first step: the required parts This simple project can be done with a minimum of components. The parts list is as follows: · Arduino Uno - 1 · 16x2 LCD -1 · Button (on request) · 100K Potentiometer - 1 · Circuit Test Board - 1 · Wires (quantity according to demand) Part II: Design The design of the voting machine is as follows: Arduino reads the keyboard input through the voting process, and the 16×2 liquid crystal display is connected to the 4-bit mode port. At the same time, this system can connect the Arduino to your PC for operation and use the serial monitor control of the Arduino IDE. Step 3: Combine the parts together As shown, attach the button to the board. You can also increase the number of buttons based on the number of candidates. Then, the liquid crystal display is fixed on the circuit board with the potentiometer, and finally all the connections are completed according to the schematic design as shown in the figure. Step 4: Connect Arduino In this step, you need to connect your Arduino to the button and LCD board. This is equivalent to completing all the settings and hardware. Step 5: Code and machining operations You can read this website for detailed operations and code. And get the post code from the website to your Arduino. Step 6: Prepare for serial monitoring Now, be prepared to operate your voter. Connect your Arduino to your PC using USB. Then open the serial monitor to vote. However, you must enter a password to access the system v - output to allow voter casts to vote - display the number of votes. Get it through the snapshot serial monitor.
Yuhai company offer custom services including Piezo Ceramic Elements and piezo transducers, Yuhai people work closely with individual customers to provide solutions. We offer engineering support services including material selection, component design assistance, device and system modeling and failure analysis.
We hope to be your best supplier with the elements of superior performance and reliability, lowest prices, most rapid delivery times and the best customer service.
Ultrasonic Transducer,Piezo Transducer,Ultrasonic Distance Sensor,Piezoelectric Transducer Zibo Yuhai Electronic Ceramic Co., Ltd. , https://www.yhpiezo.com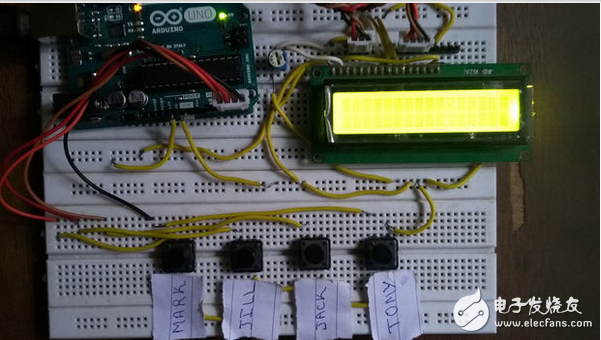

This article is selected from the electronic enthusiast "Intelligent Industry Special", more quality content, download now